Yukon Husky-eagle 1 heat exchanger replacement

Arborist Forum

Help Support Arborist Forum:

This site may earn a commission from merchant affiliate links, including eBay, Amazon, and others.

Boogieman142

ArboristSite Guru
Joined
Mar 19, 2008
Messages
678
Reaction score
61
Location
Northern NY
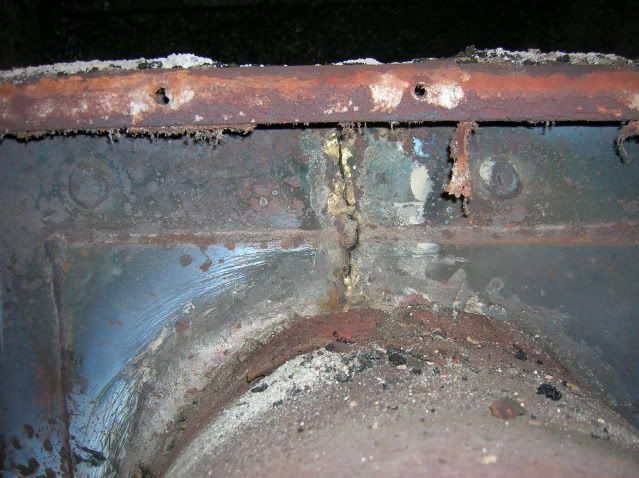
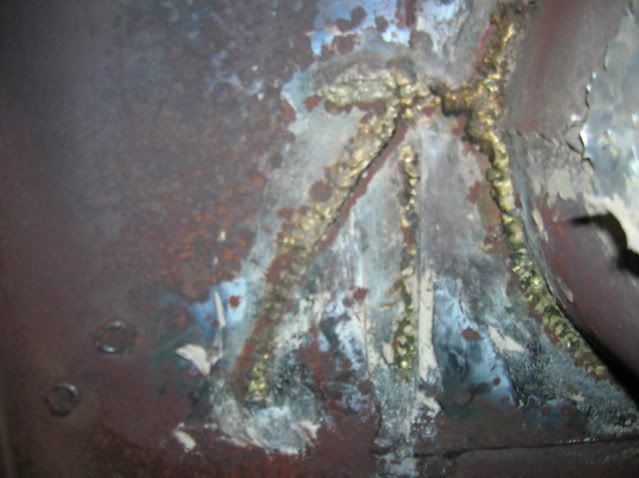
Well, CrappieKeith may appreciate this or not cause it shows people how to replace it. I have a yukon and this one bears the "Husky" badge. I just figured that i'd put up some step by step instructions on removing the heat exchanger and replacing it with a new one. This furnace was purchased new in 1980 and has been a good furnace. The heat exchanger was replaced in 1990 so this is not its first time apart, now its time for another one. I guess they changed the material they are made out of, now it is stainless steel and is thicker but maybee Keith can chime in on that for sure. This furnace also needs the firebox welded as it has developed some cracks in it. I know that I should be replacing the firebox or the whole unit because of this but I just can't right now ($$). So I have a new heat exchanger to put in and some cracks to weld. This is just going to be an as I get time to do it deal b/c of the 3 kids so don't expect this thread to progress too fast. If you try this, turn the breaker that serves the unit off as you need to disconnect some wiring. This whole project can be done in the winter time in an emergency basis but now I can take my time....maybee. And now we start with the pics.

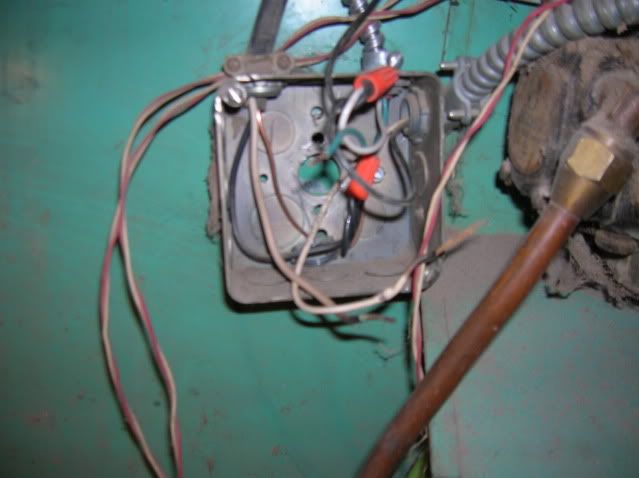
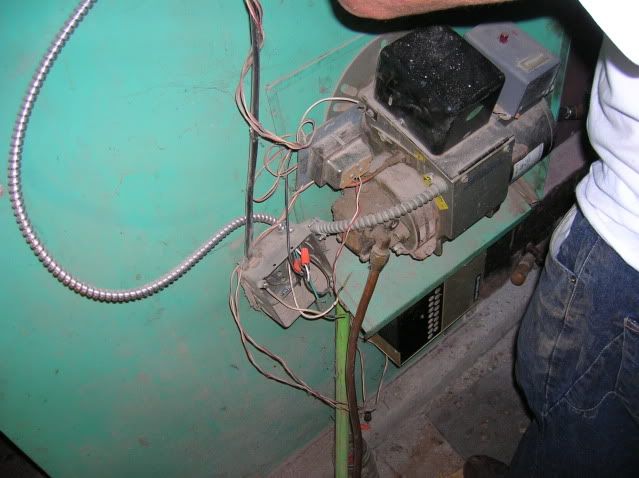
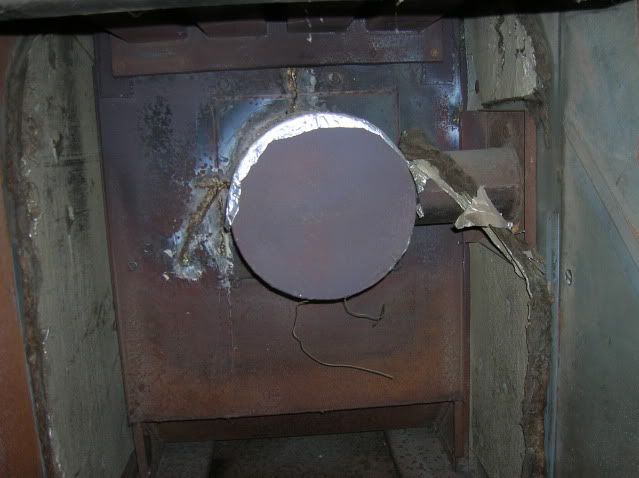
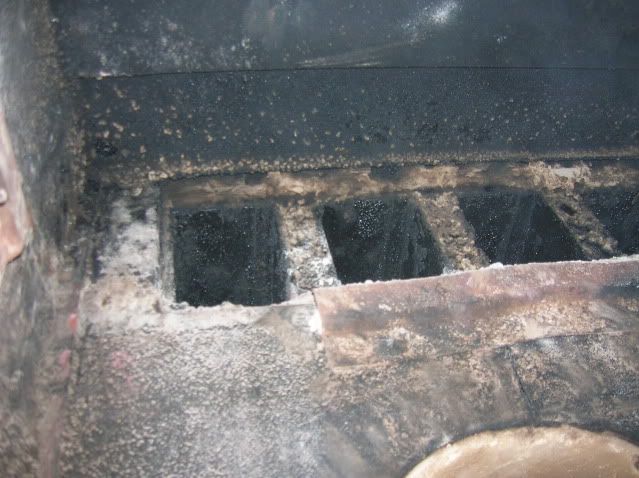
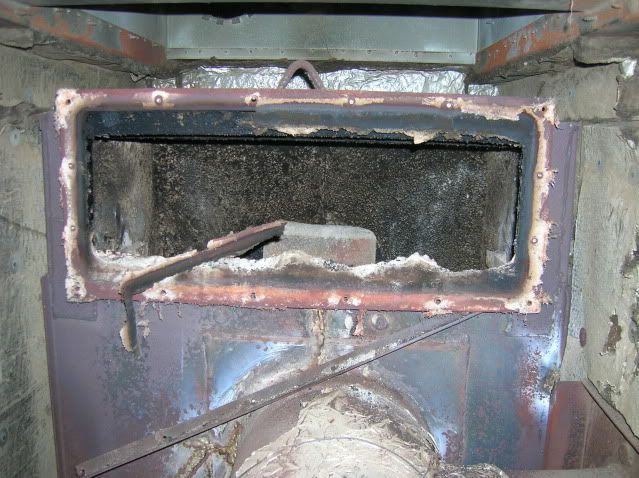
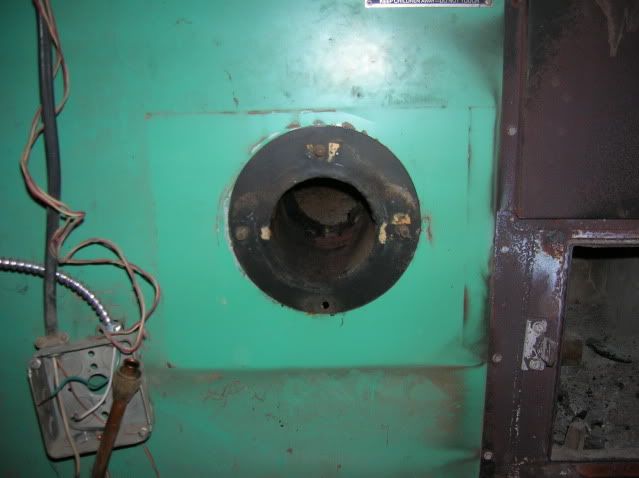
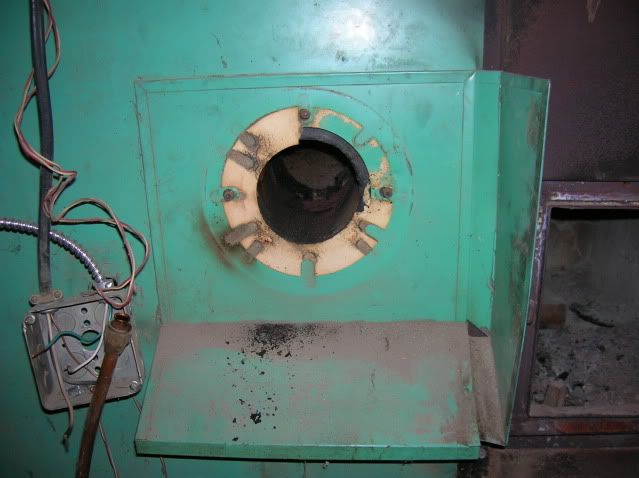
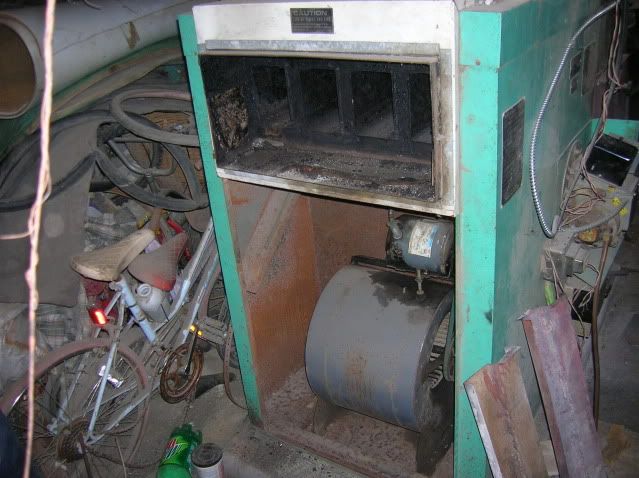
This first pic is just with the pipes removed from the outlet box.

DSCN1340.jpg


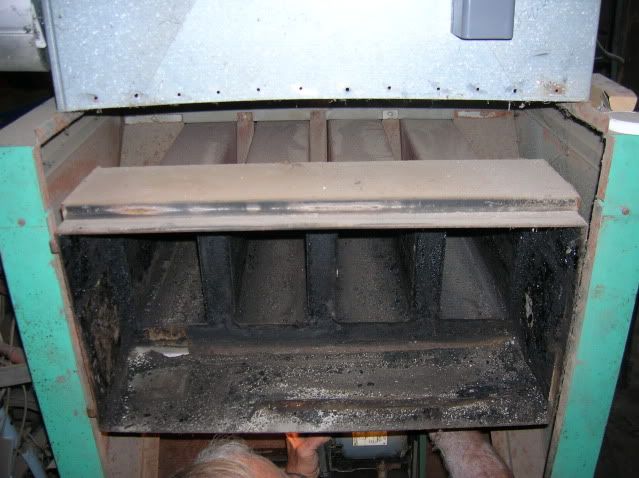
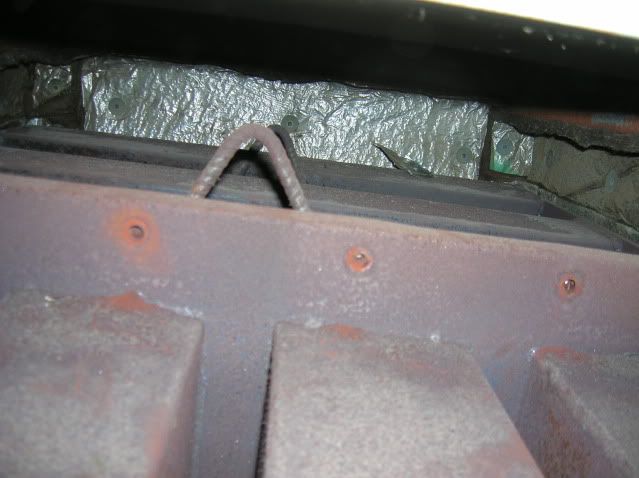
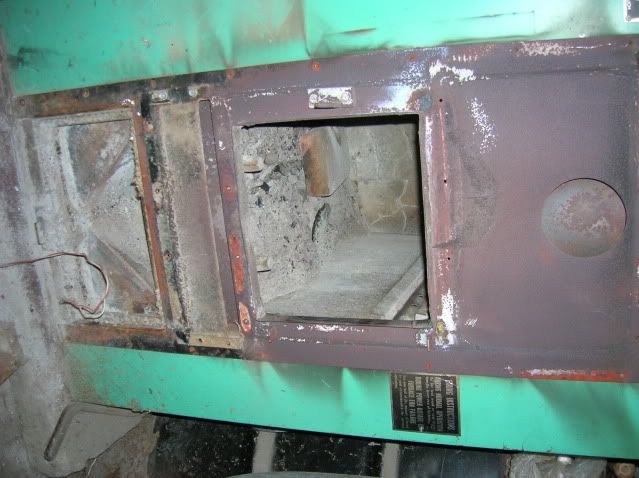
This one the outlet door is removed as well as the filter door. The filter has been removed and discarded as it has needed it.

DSCN1339.jpg


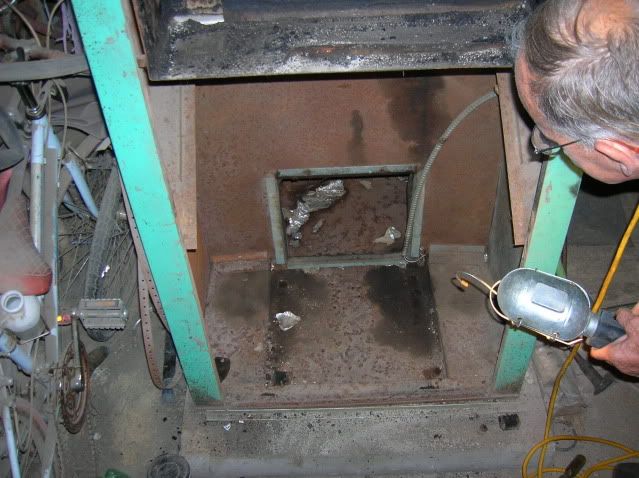
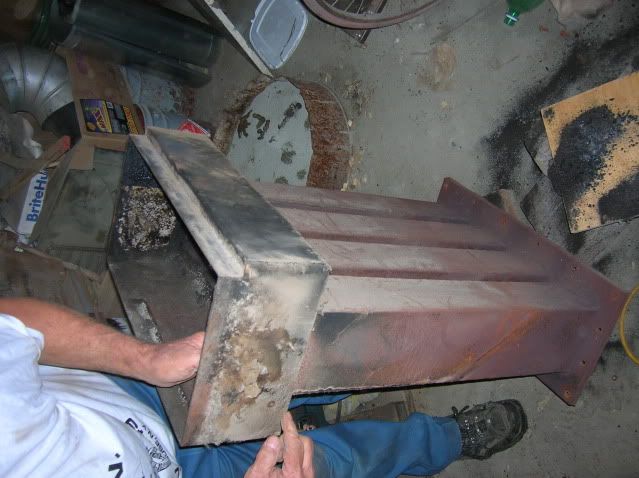
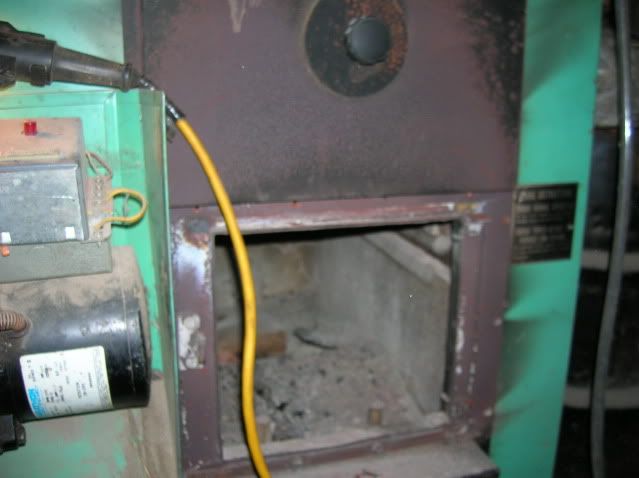
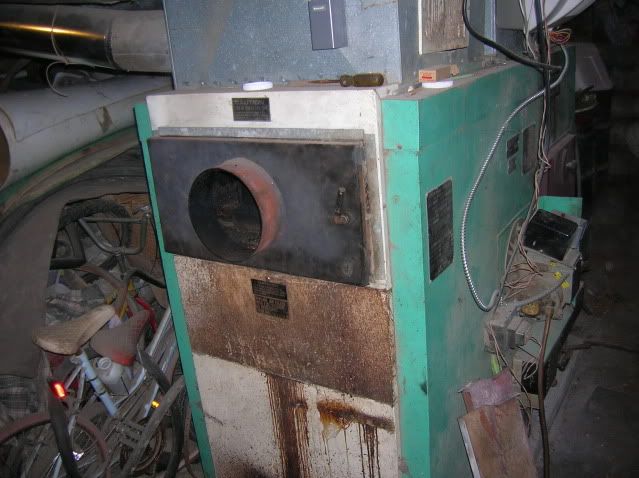
The lower door has been removed, just a few screws on the sides.

DSCN1344.jpg


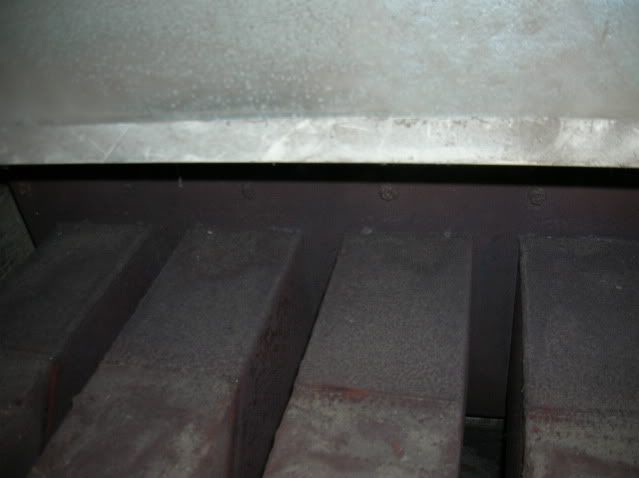
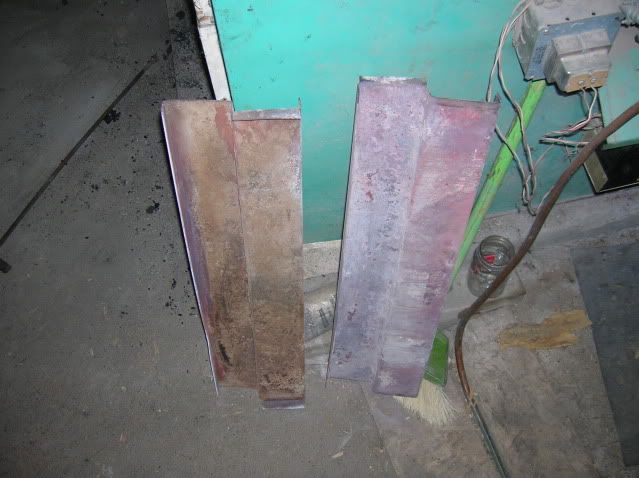
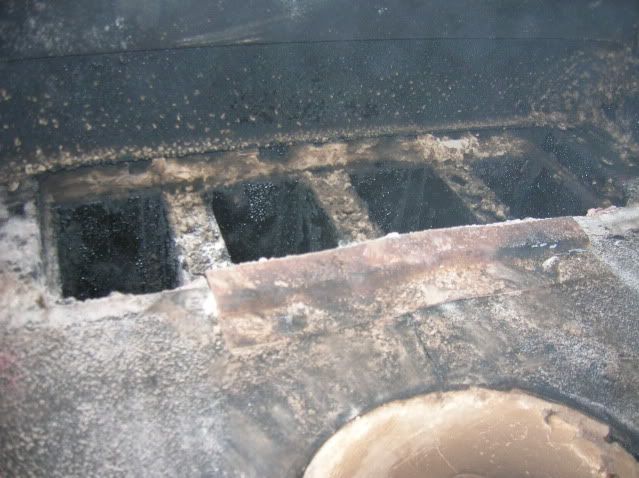
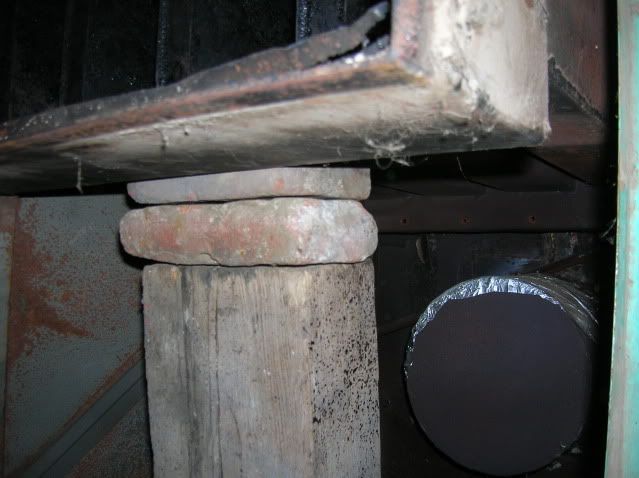
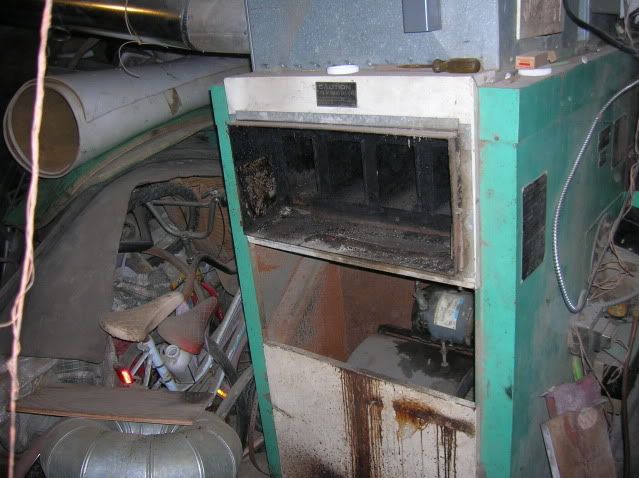
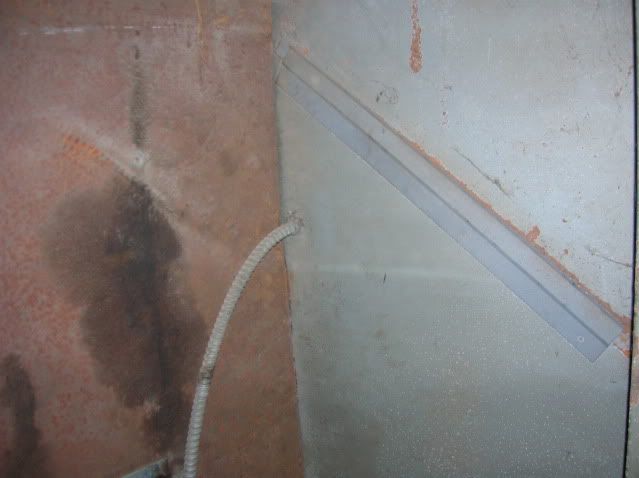
The trays that holds the filter in will need to be removed as well to remove the hot/cold furnace divider(I just call it that, no idea as to what the real name is). All that these do is just sit in a slot, just hit them up and they pop out. This is the part that holds them.

DSCN1347.jpg
 
Now the shroud that surrounds the heat exchanger needs to be removed. This shroud tucks under the cold air plenum as well, so the screws that hold that need to be removed. It will go around the hinge ok, it will just need a bit of help.

DSCN1345.jpg


Now this is where the turning off the breaker part comes in. You need to remove the wires from the blower motor but mark them so they go back on the same way later on when you re-install them. its just a matter of removing the bx-cable clamp and remove the cover from the motor and unplug the 2 wires. Once this is unhooked on mine i can just remove the motor but if yours has never been apart then there might be some nuts on the bottom of the blower mounts that go on studs. Mine are gone now as they broke the last time the exchanger was changed and were never repaired. There are rubber mounts under them that may be a good idea to replace while you are at it.

DSCN1346.jpg


Now in the above pic you can see that whip for the blower motor just dangling there, that needs to be removed in order to get the cold/hot divider out. In order for this to happen the box on the front of the furnace needs to be removed and the wiring undone, again mark or draw a picture where these wires go for installation later. You need to spin off the bx-cable retainer or you cannot remove the divider. Once it is spun off, you can remove the whip.

DSCN1348.jpg


DSCN1349.jpg
 
When you get that wire out of the way you can attack the hot/cold divider. There will be 2 L-brackets on the bottom that secure the bottom part of it, remove these. On the top there will be 5 screws into some parts that go in-between the heat exchanger baffles, remove all 5 of those. On the top of those parts that go between the baffles there are 5 more screws you need to remove those also. You can reach your hand in from above the outlet box and under the cold air plenum and reach them(atleast I can, there are some people bigger than me, not many tho).
Remove all of those in-between baffle parts. The hot/cold divider is put in there in a similar way as the trays that hold the filter are. Start at the top of each side and work your way down until it is free then it will take some jimmying and re-positioning to get it out but i'm sure you will figure it out, just try not to bend it too much. once that is out, you are left with a view of the burner(some are bolted on and some are welded on, mines welded. The bolt-on ones are for where space is a limiting factor when bringing the furnace into your home), the firebox and all of the screws that hold the heat exchanger on the bottom and sides.

DSCN1350.jpg


Now remember those 5 screws that you had to reach your arm thru the end under the plenum to get to, the part that they screwed into needs to be removed to gain access to the top bolts to the heat exchanger. There were 2 screws between the hot and cold air plenums that held mine in, yours may be a bit different. once that is removed you will get a view something like this.

DSCN1351.jpg


Now to save yourself some frustration in the future, the plates in the firebox should be removed. Opem the firedoor and there will be 2 plates above the side the burner chamber is on(some furnaces are left flue, some are right flue, mine is left flue so the plates are on the left side, for a right flue they would be on the right side) the plates are used to make the furnace run more efficient by giving off more heat to the firebox top instead of it just oing out the chimney(atleast I think so) These plates just set in there similar to the way the hot/cold divider was and the filter trays and probably won't just come out due to warpage/rust. If you hit them up they will loosen up enough to come out. these are what they look like once they are removed. You can see a pic of what holds them in below this pic. of the plates

DSCN1341.jpg


And this in the view inside the firebox when the plates are removed. Now you can actually see the heat exchanger. This makes it easier when you go to remove the bolts holding the heat exchanger and re-install it for lining up purposes and to make sure the gasket stays put.

DSCN1342.jpg


DSCN1343.jpg
 
Hey Boggieman....great post....awesome pics.....thanks!

When you think about having an almost 30 year old furnace that can be taken apart and rebuilt...what a statement that it.
Yes, the secondary is now 304 grade stainless instead of plain hot rolled steel.
The fireboxes are also thicker from 14 to 10 gauge.

The beauty of this is that you are doing the work yourself.It's not rocket science and we are here to aide in the tech end of things should they be needed.

With a furnace this old I would have reccomended to replace the firebox too, but if you think you can patch it up .....I can't stop you.
We have all of the parts for your furnace that are supposed to be in there as per U.L.
Old Huskies never die...they just get reincarnated.


Good job!
 
I hope you have some carbon monoxide detectors in the house. Just incase you miss any cracks in the firebox.
 
I hope you have some carbon monoxide detectors in the house. Just incase you miss any cracks in the firebox.

That's exactly why I would have reccomended a new firebox.
If the last one held up this long I doubt he'd need another after a full rebuild.
Really....that old firebox is plum worn out. Chances are that it fails in the dead of winter.....not a good time.
There is a 20% discount he can get off of a new firebox with all new brick,grates and doors plus new smoke baffles,jet air tube and brick retainers which are stainless too.

It is his choice though Layne ,but we would hate to hear of a fatal issues later down the road.
 
Yea, but 1700 plus shipping on it would do me in, I however am very crafty at welding so thats the next option. If I had the $$, i wouldn't even be putting a heat exchanger in, i'd replace the whole thing with a polar. These furnaces aren't too bad to work on, this will be the seccond time i've had it apart to change the heat exchanger.
 
Thats what I would have recommended is a replacement, but you said you were low in funds, which is understandable. Sometimes you just do with what you have.
 
Get youself a 6 lb. tub of Pyroseal, or equiv. refractory cement...I have only had to do one HX on a Yukon, not that bad as long as you have plenty of room on all 4 sides....how does the blast tube on the oil burner look?
 
The burner tube is ok, as long as you keep a good liner in it they last forever. Besides, I never use the oil anyway. You can see the cracks in the pic of the burner tube. They were brazed a while ago but with the heat and expansion it cracked, the brazing wasn't done by me but it will be welded good this time. I plan on drilling the ends of the crack to prevent it from spreading welding the crack shut and then welding a plate over that to keep the heat concentrated on that 1 spot and hoping for the best. Eveantually the entire thing will be replaced but that will hafta do for now. Thats what is holding it together now, refractory cement, time for a new one.
 
what about shipping? The bricks and shaker grates all are fine, just the box itself is cracked, so I will hafta check and see if i could do that.
 
I could get it out there for about 300$
I'd shop the freight for you...maybe get it down to around 200$
You've been a customer for many decades and I'd want to do the best I colud for you so you'd not have to chance any safety issue.
 
Last edited:
I thought the fireboxes were 7 gauge on all of the units.
 
The Eagles all have 10 gauge fireboxes.
This old furnace we are looking at has a 14 gauge box.
It also had a 20 warrenty when it was produced.I'd say it out lived that period.
Here's a tidbit.....when tested the firebox walls never got over 930 degrees.
It takes heats a lot higher to warp steels.
In the early 90's we decided to beef up the fireboxes to 10 gauge on those multifuels.
In the late 90's we decided to go to stainless(304) on the secondary heat exchangers plus in 84 we added the clean out door.

Since that furnace is built modulary ,it can be rebuilt. Any part of a 35 year old Husky can be replaced with the new parts we make today.
If the customer wants ...he could switch it over to gas from oil too.2 years ago we went to backing them up for 30 years.

No manufacture makes a true wood/coal/gas furnace today. They all need 2 flues and the gas will not fire the wood like in that Husky or Polar.
 
Last edited:
Well, made it down to work on it some more.

The next thing I did was take all of the bolts out that secure the heat exchanger to the firebox, but make sure that you put something under it such as what i did or it may fall and break the burner.

DSCN1355.jpg


DSCN1356.jpg


DSCN1357.jpg
 
Now at this point I have a better view of the cracks so here is the firebox with the heat exchanger removed.

DSCN1358.jpg


And the pics of the cracks that need to be welded.

DSCN1364.jpg


DSCN1363.jpg


DSCN1362.jpg


DSCN1360.jpg


DSCN1359.jpg


Now I am at the point where I can start to prepare the firebox for all of the repairing.
 
So Now I can get the metal ready to be repaired.

So its a bit easier I removed the fire door to get inside the firebox for a little easier access.

DSCN1365.jpg


And now This is me getting this 30 year old furnace ready for a new firebox(keith, need that firebox)

I removed the door, the secondary burn tubes regulator and the burner gun. When you unhook your wiring to the gun make sure you mark it all if not already done or draw a picture.

gun removed
DSCN1368.jpg


Shield removed
DSCN1367.jpg


afterburner regulator
DSCN1369.jpg


with it all and ash-pan removed
DSCN1370.jpg


thats as far as I made it tonight, night night
 
Back
Top