My Splitter Build (heavy on photos)

Arborist Forum

Help Support Arborist Forum:

This site may earn a commission from merchant affiliate links, including eBay, Amazon, and others.
Thanks, I hope so. Got a little time to spill some paint on the floor... it's going to take 2 coats painting with a brush.

splitter-18.jpg


I'm not done welding on the frame is why it is not painted... best to paint from top down any way.

JT
 
Is this splitter going to travel with the beam up? If not, what size cylinder are you going to use to lower it? That is one heavy beam.
 
Is this splitter going to travel with the beam up? If not, what size cylinder are you going to use to lower it? That is one heavy beam.
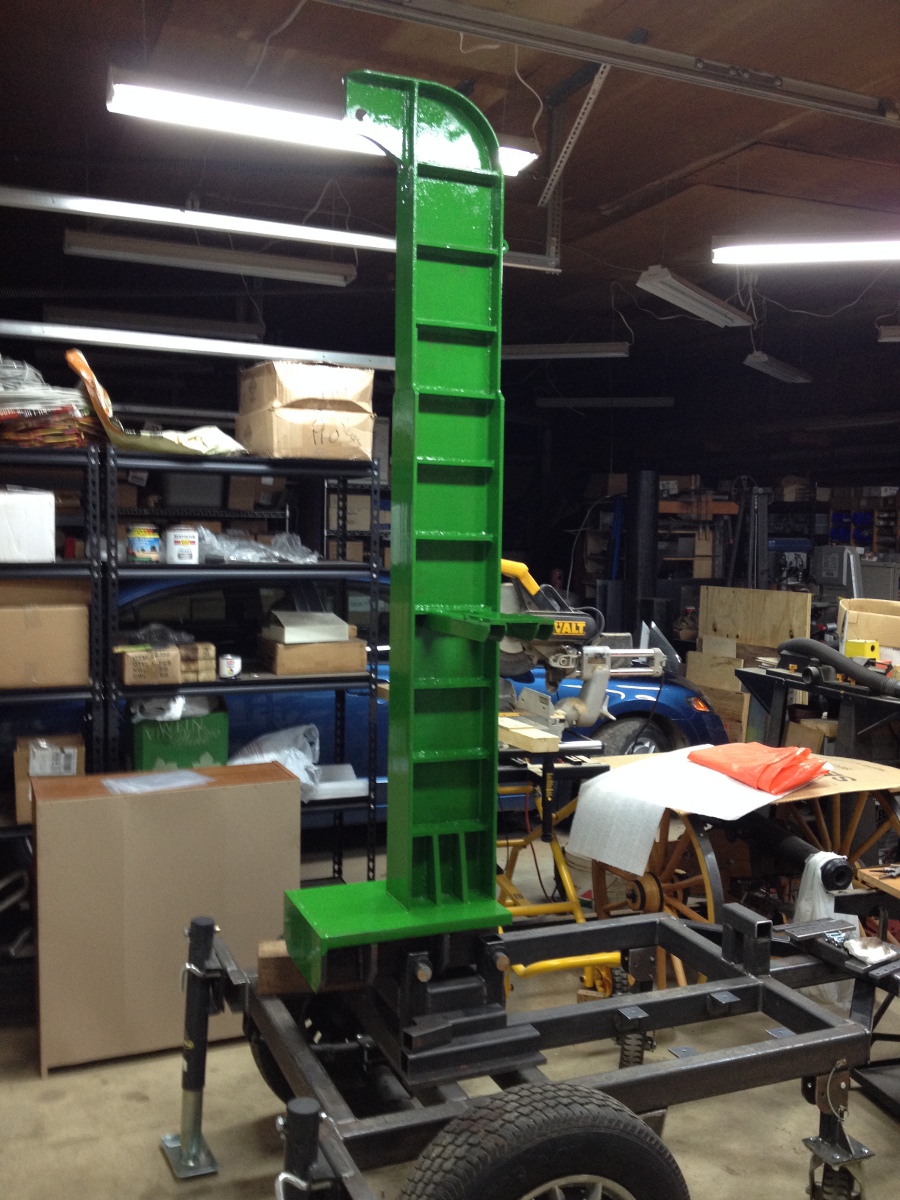
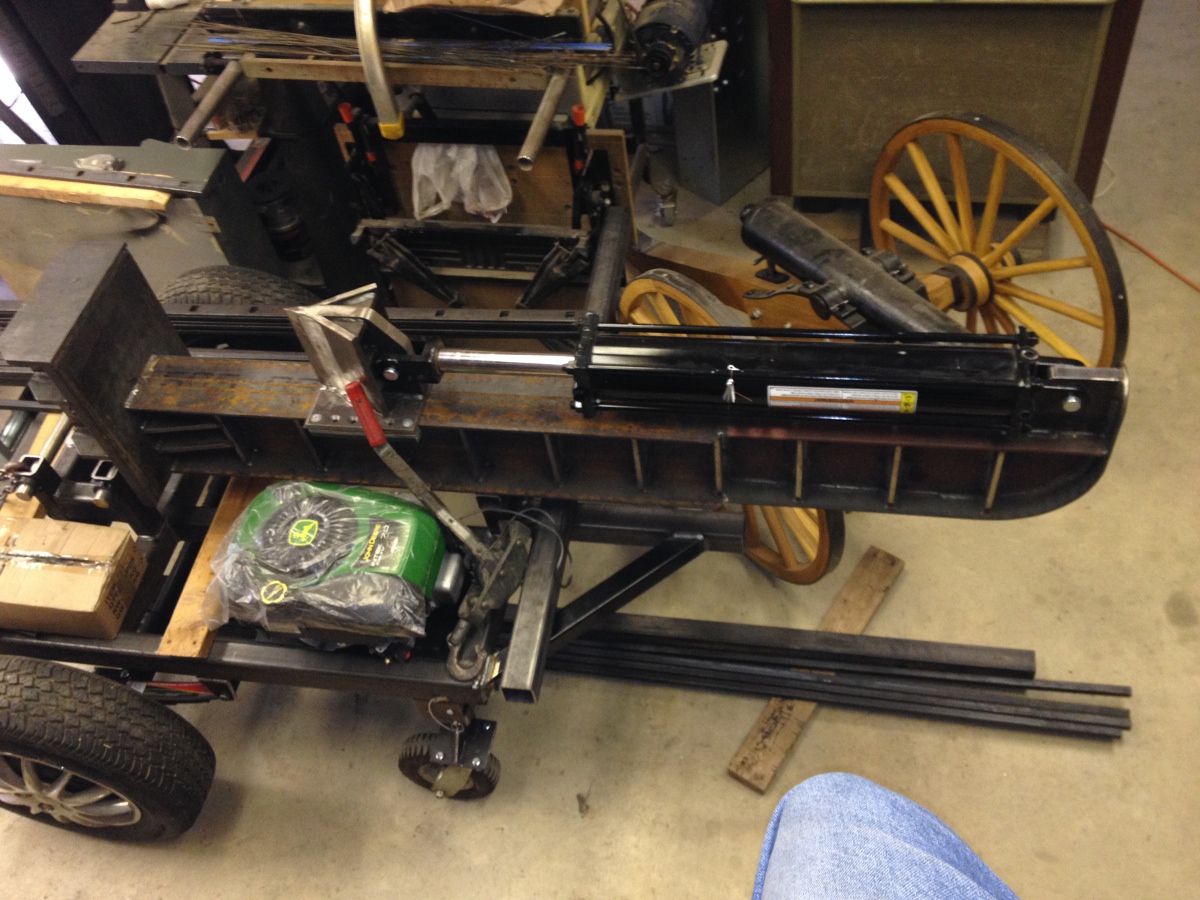
The beam is upright in the working position only. For travel it folds down and is attached to the frame. The splitting cylinder will lift and lower the beam. Here is a photo of it in the travel position.
splitter-16.jpg

Yes, it is one heavy beam.

JT
 
Thanks, I hope so. Got a little time to spill some paint on the floor... it's going to take 2 coats painting with a brush.

splitter-18.jpg


I'm not done welding on the frame is why it is not painted... best to paint from top down any way.

JT


Do you have to lift everything up to the beam when your splitting?
 
Do you have to lift everything up to the beam when your splitting?
It's no higher than a horizontal at 30" to the reaction plate and I'm closer to the wedge so I don't have to bend over when I split or chase splits for re-splitting. The splits will stay on the table (not there yet) until I'm done sizing them. That design may not be for everyone... but it works for me. I will have a lift for rounds that are too big to pick up.

JT
 
Thanks. I guess I've gotten old and frail minded but I don't see how it's going to work.

But thanks.
I will have a hook that matches up with the back of the wedge, a pad eye on the frame and a sheave on the reaction plate to make the corner with. In the travel position I extend the wedge all the way then connect the cable. As I retract the wedge it pulls on the cable, being attached to the frame at the other end the beam pulls itself up. I've done it with a come-a-long a few times and the force to raise it is quite small.

JT
 
Great build and great working height(IMOP) , How big are you going to make the table(i would make it as large as possible) and is there a spot were you can stack or stage rounds that need to be split. I found that i like being able to split, then gather 4 or 5 rounds at a time then go back to splittingIMG_20131213_214011_785.jpg IMG_20131213_213944_130.jpg .
 
Great build and great working height(IMOP) , How big are you going to make the table(i would make it as large as possible) and is there a spot were you can stack or stage rounds that need to be split. I found that i like being able to split, then gather 4 or 5 rounds at a time then go back to splitting.

Thanks for the photos. I like how yours self centers the round.

I'm thinking of using some 2" square tubing to build the tables out of with 1"-2" gaps between like a grate. Anyone have any thoughts on this idea?

Thanks
JT
 
I got my order in from Discount Hydraulic Hoses and mocked up the splitter valve.

valve08.jpg


When I removed the NPT plugs from the valve they all had red sealer on the threads. Is there a special sealer for hydraulic NPT threads?

Thanks
JT
 
loctite 567 or 569 thread sealant...
and high dow vacuum grease on the o-ring of the ORB fittings
 
if you have some that just wont seal up you, arent supposed to use teflon pipe tape.... but it does work well. its only a splitter and not a hydro motor or hydrostatic system so there isnt much to wreck if you get a flake of tape in the system. simple gear pump and a ram are both pretty indestructable. remember, im not telling you to use it, but it does work. in theory you should only have to use dope on the valve end fittings. the swivel type fittings in NPT still seal on a shoulder like the JIC fittings do. in all reality they are interchangeable except for the tapered threads
 
2" tubing is probably over kill. I used 3/4" black pipe with a 1-1/2" spacing running parallel to the direction you will be mostly sliding the rounds. This will allow trash/small pieces of bark to fall through but should keep most of the splits on the table, help the splits to slide in a straight line, & decrease the potential for pinching a finger. Pipe instead of flat or tubing helps with 2 things: 1 - Provides tapered edges which will not catch on the edges of the rounds as bad. 2 - A smaller area of contact which will have less friction = easier to slide on.

While I have see several tables & log lifts with expanded metal, I would not encourage it for these items. Small projections tend to snag on it & there is a much higher risk of catching a finger in it. There has been many a wood shop where the cast iron grating on the sides of tool like table saws were removed & replaced by either a smooth surface or parallel edges which stayed in line with the direction of travel due to fingers being injured.
 
I didn't consider the direction the splits might be sliding... as I see it in my mind they will slide left and right ie to from the wedge as I re-split.

I try and use what I have on the shelf and I don't have much round tubing mostly square. The 1 1/2" spacing is that edge to edge or center to center on your 3/4" black pipe? Hmm, I have some 1 1/2" square stainless tubing that would work well. I'm thinking I'll run the tables out over the tires for maximum work area.

For the NPT threads I use Recto-seal #5. Only a light coating after the first thread to make sure no dope gets into the system.
I see that Home Depot has Rectorseal 1.75 oz. #5 Pipe Thread Sealant

Looks like several Loctite products fit the bill 545, 569 when searching the Loctite site with this as the top hit.
Loctite 569 Thread Sealant, Hydraulic Sealant

And that is why I ask here on this site when I'm unsure.

Thanks
JT
 
I just used pieces of a 2x4 for the 1-1/2" spacing. I like your idea of going out over you tires/wheel wells. Is should help protect the fenders & make it easier to reach the splits. IIRC you were going to add a log lift. If so, I am picturing it coming off the left side of the table. I have seen splitters setup similar to yours which use a cable & pulley system to raise the lift using the splitting cylinder.

scan0004-1.jpg

scan0005-A.jpg

This splitter IIRC used the cylinder to raise his beam in place then after pinning in place was ready to split. As I looked at the photo again, noticed the table edge the operator stood against was directly over the lower frame/support. If it was me operating it, I would be knocking my shins on the lower frame. I like the table sticking out at least 4" past the frame to same my legs.
 
Last edited:
Back
Top