Porting 101

Arborist Forum

Help Support Arborist Forum:

This site may earn a commission from merchant affiliate links, including eBay, Amazon, and others.
piston1.jpg


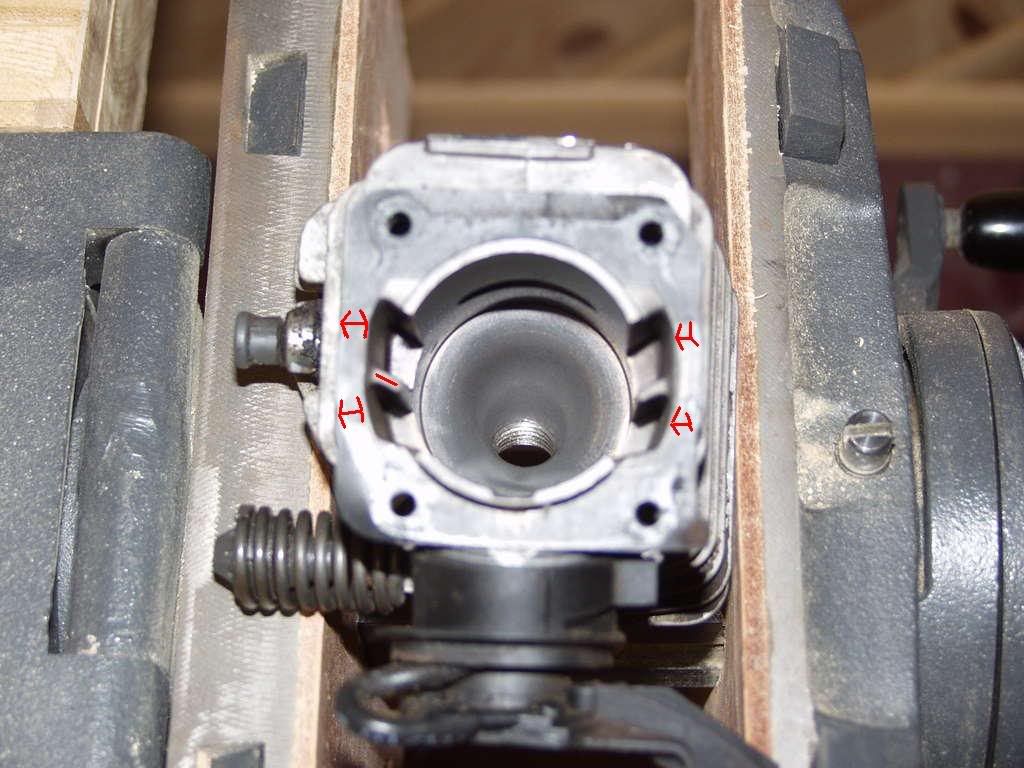
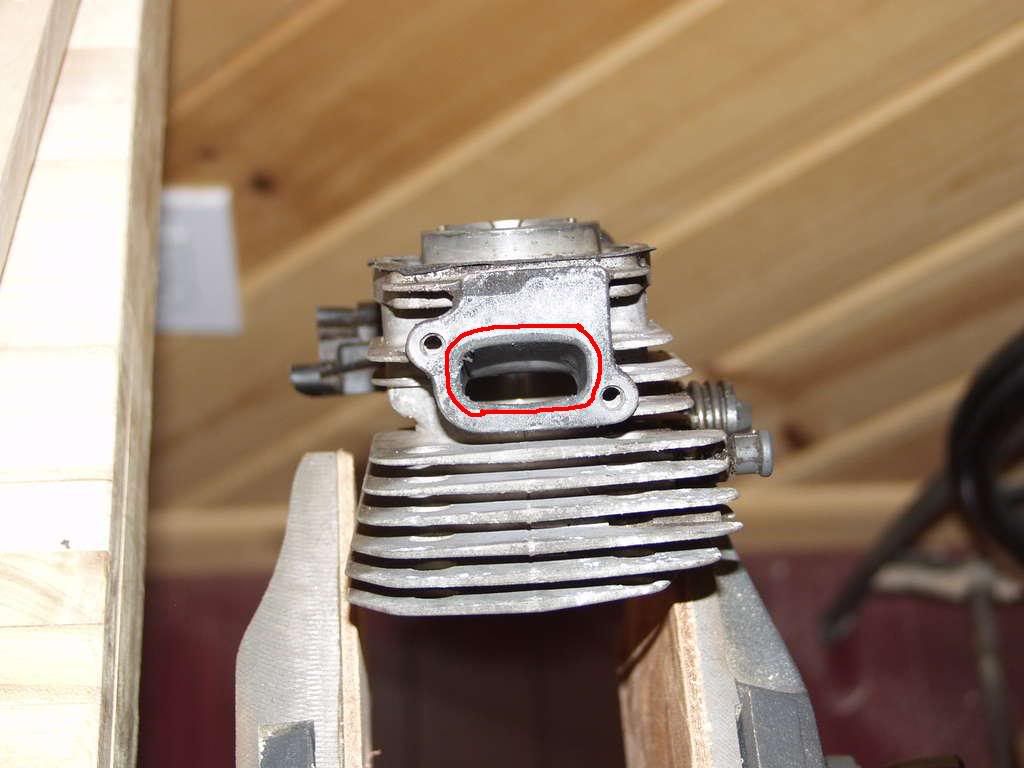
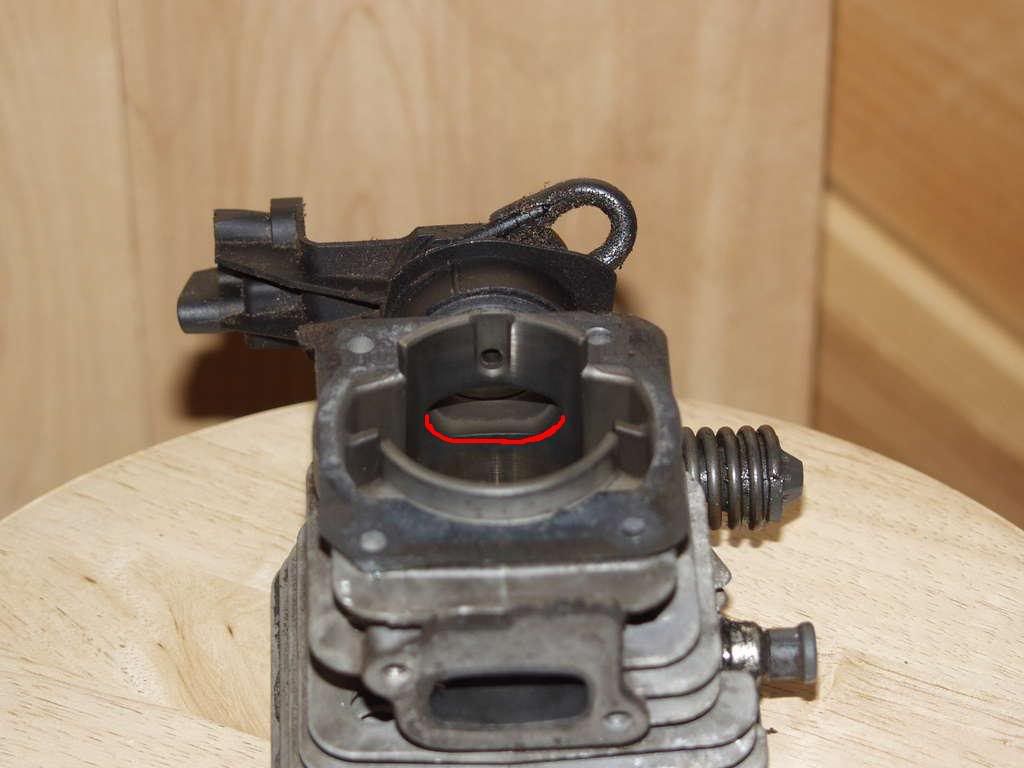
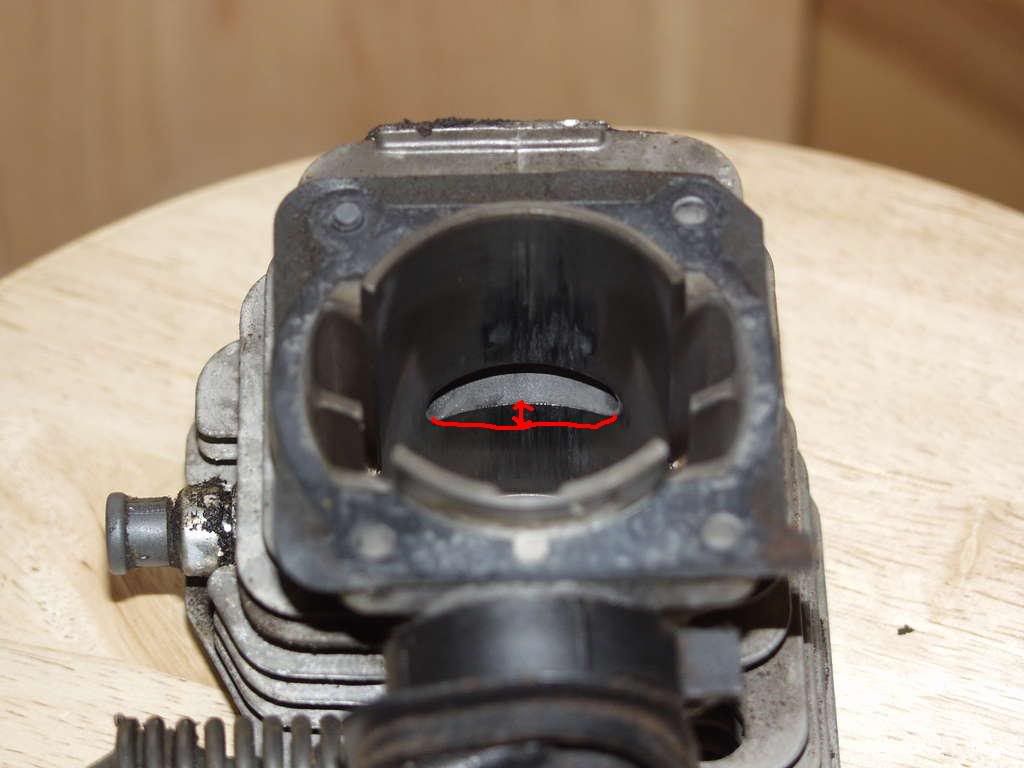
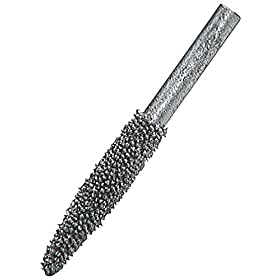
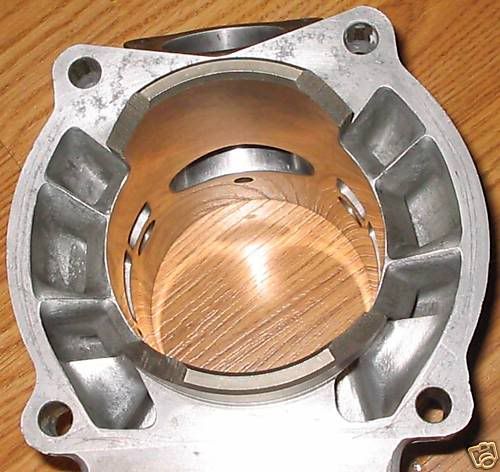
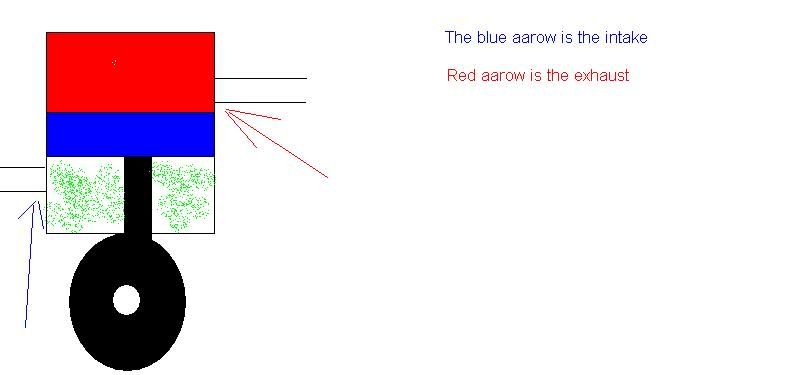
I'm not the best picture drawer so bear with me. In this picture you can see the basic idea of the engine: the green parts is where the fuel and air is. I like to pack as much fuel and air in this area as i can so improving flow into here is a big improvement. I see a lot of weed wackers and some chainsaws that could really improve in the intake area as well as exhaust. I notice a lot of small engines that have a very short intake duration (meaning how long the port window is open) and short exhaust duration. If you lower the intake port a little(dont go overboard here as you need some closed time).The closed time is the time its pushing the fuel air mixture into the combustion chamber. If you didnt have a closed time it would spray fuel out the carb and not into the transfer ports and into the combustion chamber. When you get into duration and such the main thing is to watch the video at the very top or watch basic 2 stroke operation and think in your head of the rhythm of the engine, makes me think of those old hit and miss engines. Take that rhythm and go look at your chainsaw engine and crank it around a few times by hand and watch how the ports open and close. You should see a rhythm now as you're watching the ports open and close realtive to how the piston travels. The faster the ports open and close the more rpm you get. The distance from the intake to the exhaust is somewhat like intake exhaust intake exhaust intake exhaust intake exhaust. If you have some distance between the ports you will get a rhythm like intake space exhaust intake space exhaust intake space exhaust. Remember there is a little time between the intake and exhaust stroke to allow the fuel to be pushed from the crankcase into the combustion area, so rhythm is the duration of the port window. And timeing this is on piston ported engines where the duration really matters. Thats why on dirt bikes they use reed valves. If you really mess up in the intake area you will have to make a reed cage, and thats not a bad thing if you was to make a reed cage and put reeds on your saw. But im not sure if you would be able to put the plastic parts back on anyways. The main thing to remember is when messing with the intake side of things improveing flow is a good thing. But watching the duration as well you got to have that moment where its closed to allow the pistons downward movement to push the air and fuel into the transfer ports into the combustion chamber. We wouldnt half to worry about this if we had a reed cage. If there are some people in the forum that can make some reed cages for chainsaws, I would buy one. The reed cage is awesome imo because as soon as that piston starts going down it closes and you get almost the entire downward pressure of the piston to pack all the air and fuel into the combustion area. Meaning you can open your intake as far as you like almost. Anyways, back to the piston ported engine, so when working on the intake side just remember there has to be some time in there to allow the piston to push the fuel and air into the transfers,and into the combustion area so just watch the rhythm of your engine and think of it like a song in your head the best i can decribe it is with a tune. :p

I tried,alot of capitalization and a whole lot of periods and commas.:cheers:
 
You can get an electronic copy of Jenning's book here. The specific numbers might not be right for chainsaws, but it is a great overview of the basic principles of porting, and the important considerations.
 
Here's a couple more photos

pepsifreak,

Here's a couple more pics, I'm not sure exactly what angle you need.

Here's one looking into the cylinder, leaning to see the exhaust side.

attachment.php


Here's a couple of the exaust:

attachment.php


attachment.php
 
I'm going to post some pics for TraditionalTool
these are not exact porting but rather ideas pointing out where you have metal to work with.

Porting is an art it takes a little practice.

I think the hardest part is getting everything even and not going to far that's why I say use a file to start out it does take longer but a dremel can cut very fast if you do use a dremel a stone is better than a carbide bur for starting out.

Anyways here is some pics the red means where you have some room to work with based on the pictures feel free to toss in some ideas and such but don't be afraid to try it get some files and go for it.

If your afraid of the piston ring popping out most of the time it happens when you go to wide around the bore and exceed the circumference of the piston.
As far as free porting you can get an idea how far you can go by seeing how far the skirt of the piston travels in the bore.
File a little and recheck if your worried about things like that and making holes. Just look on the outside of the jug to see about how much metal is on the outside..


350-cylinder-1.jpg


350-exhaust-1.jpg


350-intake.jpg


350-exhaust.jpg
 
Last edited:
I'm going to post some pics for TraditionalTool
these are not exact porting but rather ideas pointing out where you have metal to work with.
Ok, would like to understand some guidelines on what you are trying to accomplish.
Porting is an art it takes a little practice.

I think the hardest part is getting everything even and not going to far that's why I say use a file to start out it does take longer but a dremel can cut very fast if you do use a dremel a stone is better than a carbide bur for starting out.
I think I have some stones, but not sure they will fit my dremel. I can get a bit for the dremel if I need.

I won't have my piston for a couple days, so can play with this cylinder, I need to clean it up also, it is still scorched inside.
Anyways here is some pics the red means where you have some room to work with based on the pictures feel free to toss in some ideas and such but don't be afraid to try it get some files and go for it.

If your afraid of the piston ring popping out most of the time it happens when you go to wide around the bore and exceed the circumference of the piston.
As far as free porting you can get an idea how far you can go by seeing how far the skirt of the piston travels in the bore.
File a little and recheck if your worried about things like that and making holes. Just look on the outside of the jug to see about how much metal is on the outside..

On the following pic, are you trying to thin the wall from the inside to narrow the inside, enlarging the chamber effectively?

And what about the mark you have on the left center fin, are you trying to thin that out so it is thinner? How much would you take, as a target?
350-cylinder-1.jpg


Then open the exaust to allow more flow out.

However, could you explain the theory behind the intake and exhaust ports inside the cylinder? Seems that the ceiling is being raised on the exhaust substantially, to even that out, at least I think that is towards the top the cylinder. The intake you just take it slightly as it is pretty even already??? The exhaust is raised to even out with the corners pretty much. Is that right? Or is that just coincidental?
 
I have a small orange cylinder stone in my dremel box, and I have one of these which is tungsten carbide. Will this work? (it's small tip)

I don't know if I can cut metal with this bit...

41FTN5W2V8L._SL500_AA280_.jpg


EDIT: it says soft metal, that's not a cylinder though, is it?
 
Last edited:
Well the exhaust port is pretty wide to begin with the curve part of it meaning the port pretty well wraps around the piston in the jug so if you went wider making the port go further around the piston you might get it too wide and the ring will pop out
you could make the port taller meaning working on the roof of the port (the part close to tdc) and a little on the bottom to widen the "smile" of the port to give more flow.

the first pics i posted of the dirt bike jug you can see how they make knife like edges that's what the little line ment on the jug i forgot to do the other side.
The intake you can widen it a little but the intake should be ok the way it is if your afraid to mess with it worse case is if you go to far on the intake you would just half to make you a reed cage and a reed cage isn't a bad thing
If it was to happen.
But making the intake open a little more helps.

The transfers on the bottom (the one with the four arrows) you have some room to work on the sides to widen a little just don't forget your gasket has to sit on it.

porting is more or less shapeing the ports and making the flow better granted you can change the timeing and such but the only timeing you really half to worry about is the intake side and if you mess that up you can just make a reed cage and your back in business.

when I say a reed cage a reed is a thin pieace of metal that only flows one way.
On a piston ported engine the piston acts like a reed valve in a way.
The good thing about a reed is that as soon as the piston goes down in the jug the reed snaps shut and forces the air and fuel into the combustion chamber so in a way you get the full downward pressure to push the fuel into the combustion chamber.

On piston timed engines like chainsaws and weed wackers there is a moment that the intake opening is closed but there is still downward movement of the piston so the rest of that travel is used to push the air and fuel into the combustion chamber.
 
That bit would be fine files even drill bits work too anything that will grind the metal.
The jug isn't that hard of a metal the coating isn't super hard either you would be suprised how fast you can take metal down with just a round chain file.
 
TT take that boot off the intake and take some pics of the intake side, that is where 90% of the work needs to be done on that cylinder.
On the transfers, just smooth everything around the edges and bring the centers to as much of a point as you can to "encourage" the air to move smoothly.
 
Well the exhaust port is pretty wide to begin with the curve part of it meaning the port pretty well wraps around the piston in the jug so if you went wider making the port go further around the piston you might get it too wide and the ring will pop out
Yeah, that makes sense. And in that regard it seems that the center fin of the tranfer ports would need to be flat to provide support for the ring as well.
you could make the port taller meaning working on the roof of the port (the part close to tdc) and a little on the bottom to widen the "smile" of the port to give more flow.
I've read that it's not good to stop modifying the roof and bottom too much. Is that true?
The intake you can widen it a little but the intake should be ok the way it is if your afraid to mess with it worse case is if you go to far on the intake you would just half to make you a reed cage and a reed cage isn't a bad thing
If it was to happen.
But making the intake open a little more helps.
I've taken some pics per redneck's comments, but your comments and his seem to conflict. It doesn't seem like that is that much to play with on the intake, where he says that is where most of the work needs to be done. You had very little marked on the pic above for the inside of the intake port. I don't see much on the outside, but some can open up, certainly.

I don't understand the center fin of the transfer ports, so I just want a knife edge along the top, or on the inside edge of the cylinder?

The transfers on the bottom (the one with the four arrows) you have some room to work on the sides to widen a little just don't forget your gasket has to sit on it.

porting is more or less shapeing the ports and making the flow better granted you can change the timeing and such but the only timeing you really half to worry about is the intake side and if you mess that up you can just make a reed cage and your back in business.

when I say a reed cage a reed is a thin pieace of metal that only flows one way.
On a piston ported engine the piston acts like a reed valve in a way.
The good thing about a reed is that as soon as the piston goes down in the jug the reed snaps shut and forces the air and fuel into the combustion chamber so in a way you get the full downward pressure to push the fuel into the combustion chamber.

attachment.php


attachment.php
 
I see what your talking about now, how the edge is knife like along the edge.

In my case I wouldn't want to touch the inside flat area of the cylinder wall, I don't think. Only the top ridge, right?

Sorry for all the Qs, I almost understand what I need to do. Thanks so much for the help.
 
I see what your talking about now, how the edge is knife like along the edge.

In my case I wouldn't want to touch the inside flat area of the cylinder wall, I don't think. Only the top ridge, right?

Sorry for all the Qs, I almost understand what I need to do. Thanks so much for the help.

TT hold up!!!

Don't start cutting yet!

From what I can see of Pepsi's red lines, you are going to get yourself in trouble.

When just starting out, you do not want to cut on the top and bottom of the ports, as that will affect timing. Down the road maybe, but your initial work should just be to widen the ports.

For the exhaust, you might want to increase the width (measured across the port, not along the circumference of the cylinder) to 60-65% of the bore diameter. More than that and you have to be careful about short-circuiting (charge going directly from the transfers to the exhaust).

When widening, you need to be keep 3 things in mind in addition to not getting too close to the transfers:

1. Leave 2 mm of piston skirt seal on either side of the edges of the port.

2. Widening the port puts stress on the rings because they have to pop in to the port and be squeezed back into the cylinder. This means that as you widen, you need to maintain or exaggerate the oval shape of the cylinder, and chamfer the edges of the port. It also means the port must be symmetrical on either side of the vertical axis. An uneven window will shift the ring as it moves in and out, and can cause the edge of the ring to push against the pin in the groove, eventually working it out and allowing the ring to spin. if that happens, you'll catch an edge in the port for sure.

3. Don't cut the roof or the floor of the port. At least not yet. There are plenty of gains to be had by widening. Increasing the duration makes the power curve much more peaky than gains gotten from widening.

As for the transfers, you can clean them up and work on the bottom, but other than that, you should leave them alone for the time being. Widening the transfers typically boosts the mid-range, not the peak.
 
Last edited:
1. Leave 2 mm of piston skirt seal on either side of the edges of the port.
I'm not sure I understand this.
2. Widening the port puts stress on the rings because they have to pop in to the port and be squeezed back into the cylinder. This means that as you widen, you need to maintain or exaggerate the oval shape of the cylinder, and chamfer the edges of the port. It also means the port must be symmetrical on either side of the vertical axis. An uneven window will shift the ring as it moves in and out, and can cause the edge of the ring to push against the pin in the groove, eventually working it out and allowing the ring to spin. if that happens, you'll catch an edge in the port for sure.
I thought this is what pepsi was trying to explain.
3. Don't cut the roof or the floor of the port. At least not yet. There are plenty of gains to be had by widening. Increasing the duration makes the power curve much more peaky than gains gotten from widening.
This is what I was asking about as it is what I had heard.
As for the transfers, you can clean them up and work on the bottom, but other than that, you should leave them alone for the time being. Widening the transfers typically boosts the mid-range, not the peak.
Ok, I'm still trying to understand what I want to cut/grind out. Now I'm not clear...:monkey:
 
I have a small orange cylinder stone in my dremel box, and I have one of these which is tungsten carbide. Will this work? (it's small tip)

I don't know if I can cut metal with this bit...

41FTN5W2V8L._SL500_AA280_.jpg


EDIT: it says soft metal, that's not a cylinder though, is it?

I used one of those to do my 262XP works well but cloggs up so keep spraying it with WD40.

I soaked mine it caustic soda with warm water a few times and it took the aluminium out and didnt damage the bit.
 
edisto said:
1. Leave 2 mm of piston skirt seal on either side of the edges of the port.

I'm not sure I understand this.

If you make the port too wide, you'll be wider than the piston surface if there is a cutaway for the wrist pin or for a window.


Ok, I'm still trying to understand what I want to cut/grind out. Now I'm not clear...:monkey:

TT...go back to post #22 and follow the link I have there. There is a pdf of Jenning's book, which explains all of the principles and tradeoffs that you need to understand. The actual time-area numbers might not be applicable, but the approach is.
 

Latest posts

Back
Top