08S Restoration

Arborist Forum

Help Support Arborist Forum:

This site may earn a commission from merchant affiliate links, including eBay, Amazon, and others.
teacherman

teacherman

Aging out of the insanity...
AS Supporting Member
Joined
Feb 17, 2008
Messages
4,619
Location
Shenandoah Valley
Reinforcement?

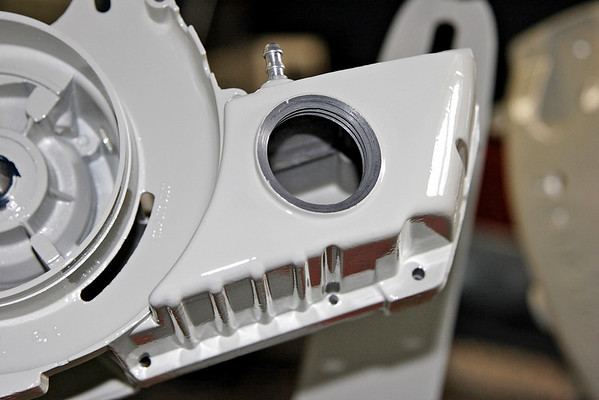
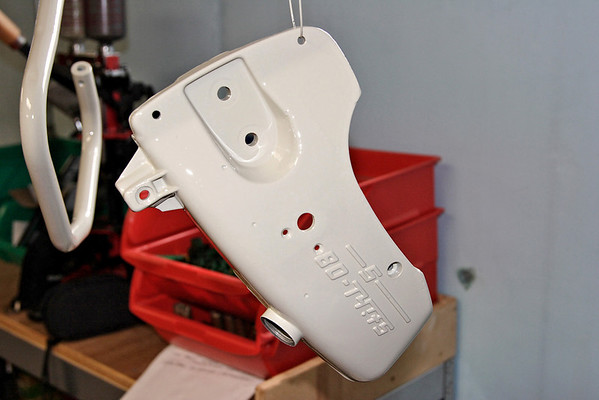
The report from Pinemartin is that the shroud is lovely kirksite, AKA pot metal. It's welded but is going to require some filler to make pretty. Hopefully it'll hold up to the tiny amount of use it'll get.

This is like the ADD third grader suggesting something to the professor, but I was wondering if it would be appropriate to rout a slight recess into the underside of the shroud, then JB a thin piece of high strength alloy to it, then feather out the fill like a car body repair, so that the increased thickness is not noticed without actually measuring it. Just so it could resist the vibration from a non-AV saw. Or would that mess up the collector value, kind of like re-bluing an old gun? Thanks, I really enjoy looking at pictures of your projects.
Gotta go, the short bus is waiting..........:chainsaw:
 
blsnelling
Joined
Nov 8, 2006
Messages
53,727
Location
Franklin, OH
This is like the ADD third grader suggesting something to the professor, but I was wondering if it would be appropriate to rout a slight recess into the underside of the shroud, then JB a thin piece of high strength alloy to it, then feather out the fill like a car body repair, so that the increased thickness is not noticed without actually measuring it. Just so it could resist the vibration from a non-AV saw. Or would that mess up the collector value, kind of like re-bluing an old gun? Thanks, I really enjoy looking at pictures of your projects.
Gotta go, the short bus is waiting..........:chainsaw:

Don't put me up there like that:) I think your idea is very worth while. The shroud has been welded and smoothed with filler. But I'd think it would be a very good idea to reinforce it on the back side with a strip of metal bonded on with JB Weld. The way these old things vibrate, the weld alone may not hold up. I don't want to ruin a nice paint job with a re-cracked shroud. I'll probably take your suggestion.
 
teacherman

teacherman

Aging out of the insanity...
AS Supporting Member
Joined
Feb 17, 2008
Messages
4,619
Location
Shenandoah Valley
Don't put me up there like that:) I think your idea is very worth while. The shroud has been welded and smoothed with filler. But I'd think it would be a very good idea to reinforce it on the back side with a strip of metal bonded on with JB Weld. The way these old things vibrate, the weld alone may not hold up. I don't want to ruin a nice paint job with a re-cracked shroud. I'll probably take your suggestion.
Thanks, I'm a bit bashful about posting my ideas, being a newcomer and all.
This idea is really anal, requiring 3 bottles of Milk of Magnesium just to get it out, so to speak :blob4: Maybe little rubber grommets could be let into the underside of the screw holes in the shroud, if there is enough meat on there to take the enlarging, isolating the shroud from direct contact with the case, making a hidden AV mount for the shroud. A bit of trouble to be sure, but....no sacrifice too great for the finished result makes for a darn fine end product

methinks maybe methinks too much:help:
 
blsnelling
Joined
Nov 8, 2006
Messages
53,727
Location
Franklin, OH
Use a stainless mesh in the JB.. very strong, lots of bonding points, can be deformed to any compound curve and lays down exactly where you put it

I see the advantage of the screen. With all the meshing, there's no chance of it not bonding to it. I'll take a trip to Lowes and see what I can come up with. I wonder what dept I'd find something like that in?
 
blsnelling
Joined
Nov 8, 2006
Messages
53,727
Location
Franklin, OH
I got all the grey urethane on last nigh. I wanted to start putting it together today but thought better of it. This paint job costs too much and looks too good to mess up, so I'm going to let it dry until Monday. Besides, we've got like 15" of blowing snow to deal with today.

263357556_a6Qyn-M.jpg


Check out the gloss here.
263357721_6nGmz-M.jpg


I forgot to tape off the starter rope opening.
263357573_XXzJF-M.jpg


263357623_y5Mrt-M.jpg


263357639_viepv-M.jpg


I dressed the rails before painting.
263357730_KwU8T-M.jpg


263357551_odn8m-M.jpg
 
mjbilbo

mjbilbo

ArboristSite Member
Joined
Jan 16, 2007
Messages
77
Location
Colorado
the 08 is a great saw. The only issue I ever had with mine was the oiler. Removed it and flushed it out with kerosene a couple of times and it seems to work great now. Had a local Stihl shop sharpen it and they did a cleaning job that ate the paint off it. I was pretty pissed about it but they just said it runs great and not to worry about paint. :chainsaw:
 
blsnelling
Joined
Nov 8, 2006
Messages
53,727
Location
Franklin, OH
Real Nice, Looks Like A Pro Job By All Means

Then I won't tell you about the run I got in the top of the recoil housing:dizzy: 
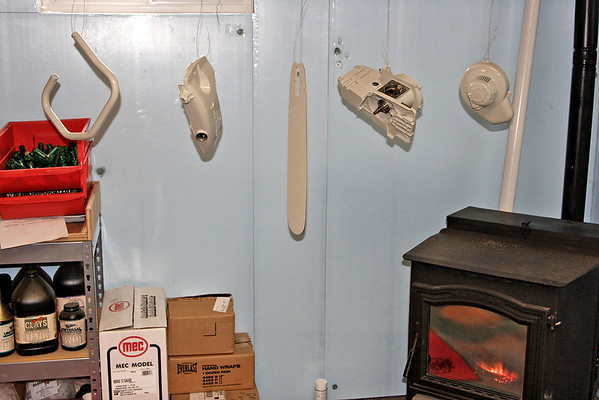
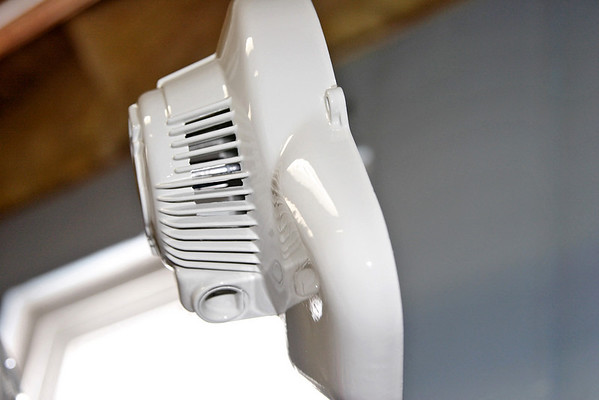
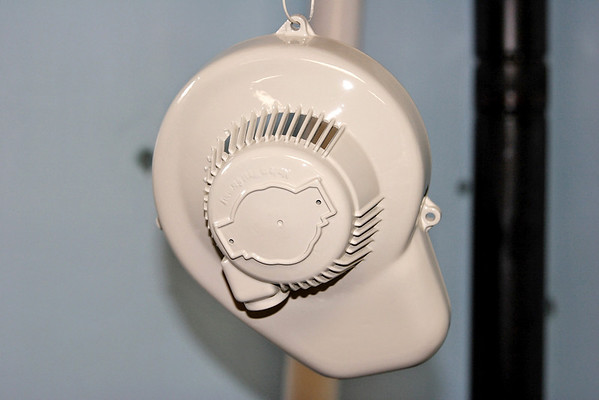
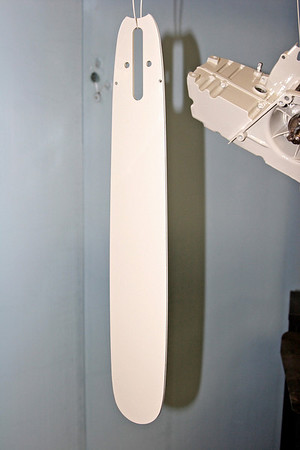
It was hanging upside down. While it was still wet, I wiped it off and shot a little more paint on it. I then went and held it near my garage heater. It flowed right out. I got lucky on that one. Everything else turning out beautiful.
 

rxe

ArboristSite Guru
Joined
Jun 7, 2006
Messages
789
Location
UK
I was wondering something. You have painted the case all in one piece - which is fine as long as the bearings and seals are good (hope you checked, because splitting that now would hurt! :) ). How did you keep the crap out of the internals when you were prepping the case? What is your clean up process? Dishwasher then sandpaper, or bead blaster?
 
Lakeside53

Lakeside53

Stihl Wrenching
Joined
Dec 25, 2004
Messages
24,802
Location
Woodinville, WA
Nice job Brad.. but I would have spit the case to so paint doesn't bridge the gasket (where flaking/chpiing will start), and to keep it out of the screws. And while I was in there, replaced the $2.00 bearings... (yep.. generic 6202 work fine in these old saws). Seals are very cheap also.


Of course, if you're not going to run it.. then... ;)
 
blsnelling
Joined
Nov 8, 2006
Messages
53,727
Location
Franklin, OH
Thanks guys. Everything was taped off with the blue painters masking tape. The fuel line hole was taped on the inside. I removed the tank screws that show on the back and bottom. The crank bearings are good and the seals can be replaced without damage to the paint. I would simply take a razor knife and cut the paint if I had to disassemble anything. I did clean the saw in the dishwasher. I then sprayed everything with carb cleaner to remove any residual oils and grease. That by itself removed any shine. I then used steel wool and sandpaper to final prep the surface. Two coats of the aerosol self-etching primer were sprayed on Thursday evening. Friday i sprayed 3 coats of Urethane. Two is all that's required, but there are so many nooks and cranies, I just wanted to make sure I had complete coverage.

BTW, I will run this saw, but only for demonstration purposes. I will not use it to cut firewood. I will run it at GTGs and the like. Same with the 07S.
 
Last edited:

Latest posts

Top